Release Notes – 2020 R4
Release Notes – 2020 R4
Earlier this year, Flowingly saw us release a raft of Process Mapping upgrades. Well, that wasn’t the only big project we were working on for 2020.
With the latest release of Flowingly we’re taking workflow up a level with our new Rules engine! Retaining the same ease-of-use that you have come to expect, the Rules engine makes it easier than ever for business users to create bespoke workflows that suit THEIR business.
Rules engine? What is that?
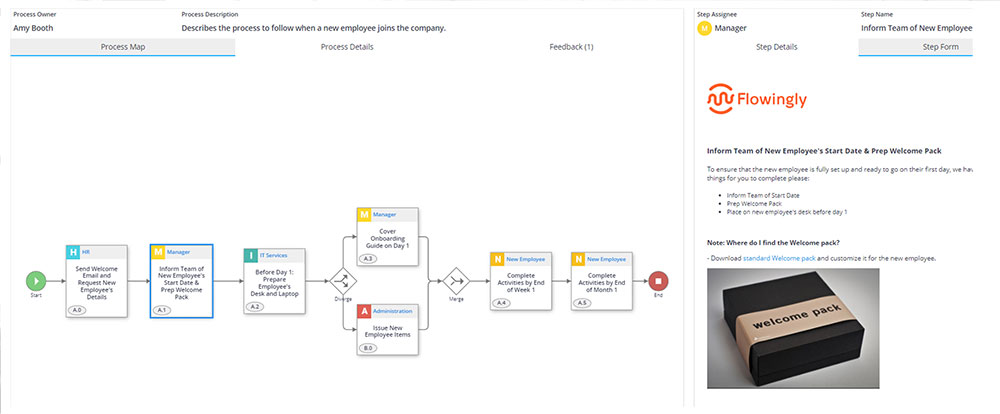
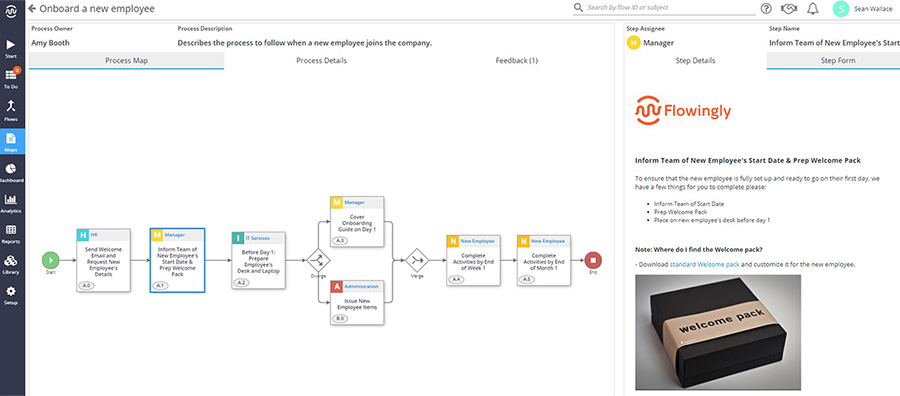
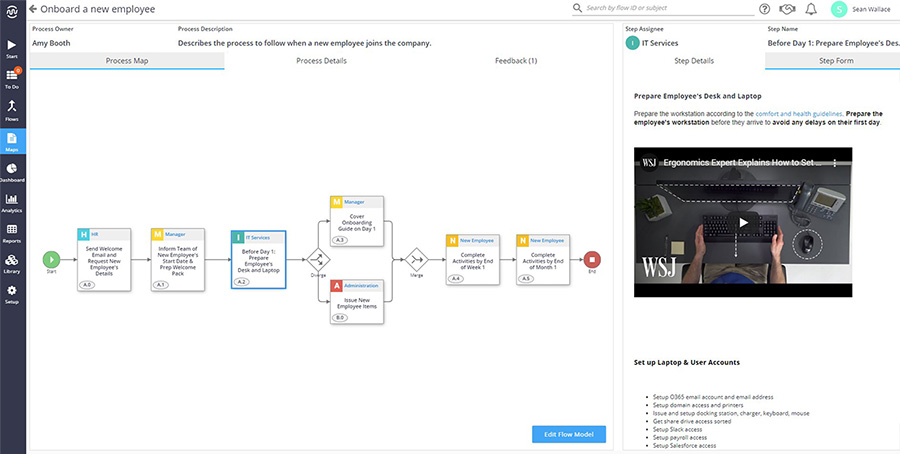
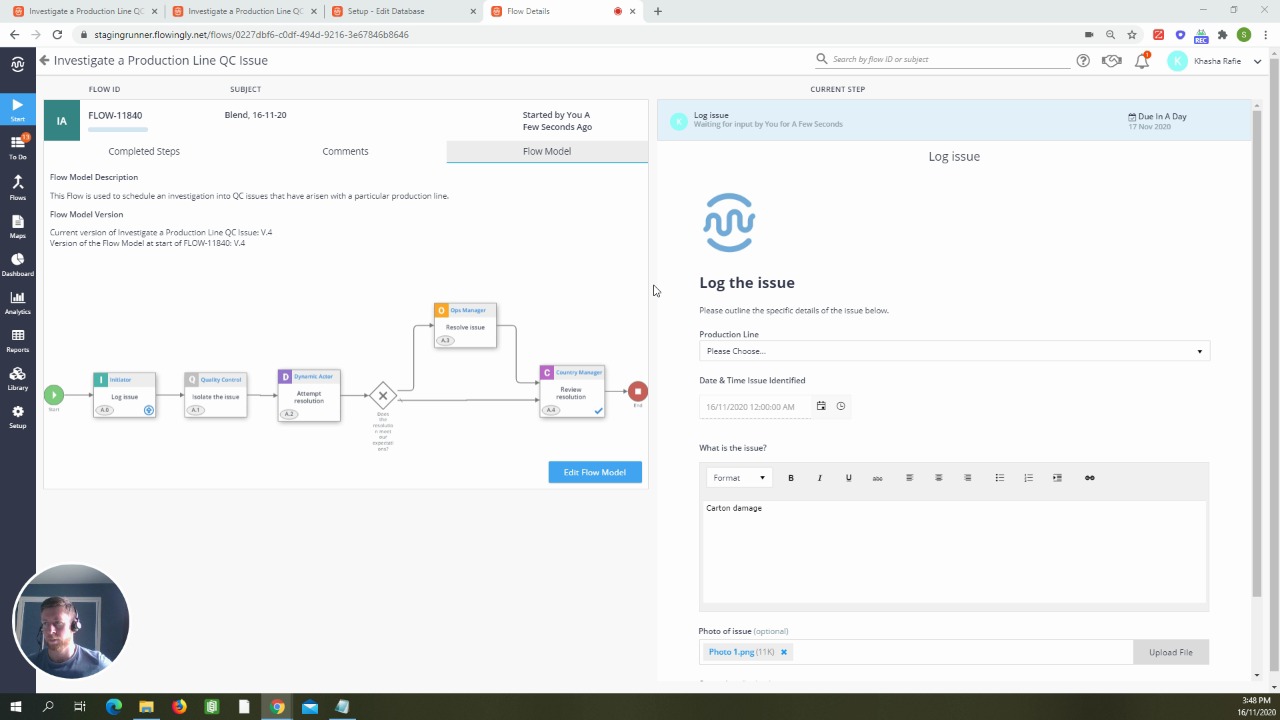
Next time you create or edit a workflow step you’ll notice a new Rules tab alongside the Details and Form tabs.
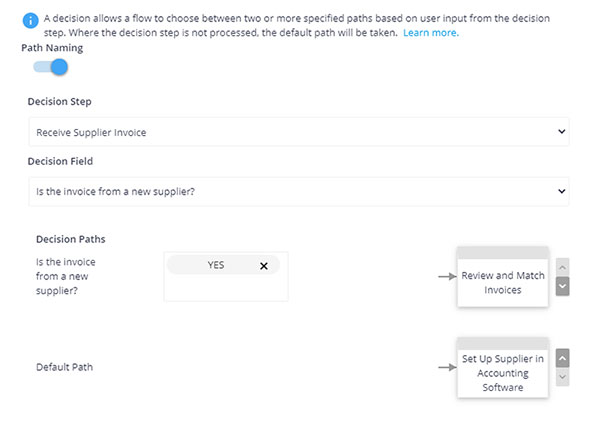
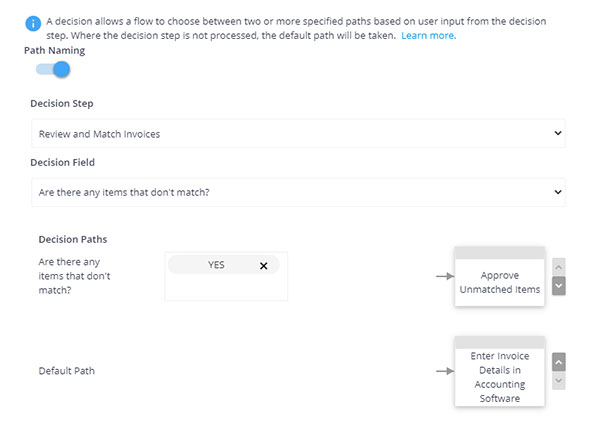
This allows you to use IF THIS THEN THAT logic to direct a workflow. The first rule to be released will allow you to set the Assignee of a future step based on an action taken in a previous step.
Using a Database, you can now assign a Step based on relationships within that Database.
How would I use it?
There are all sorts of ways you can use this:
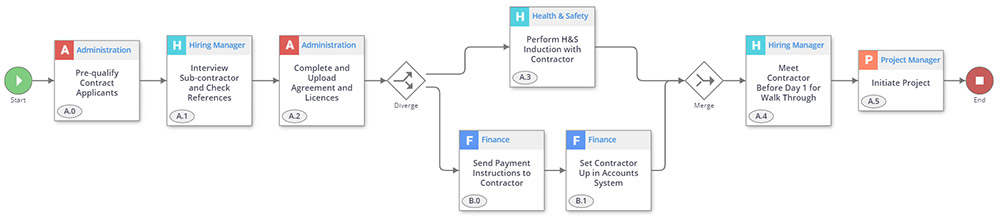
- Allocate a step based on geography. For example, if a user selects in Step 1 that their request is for the Wellington office then it allocates Step 4 to the Wellington Area Manager. Alternatively, if they select Auckland it will allocate to the Auckland Area Manager.
- Send a step to someone based on responsibility. An easy way to manage when one Capital Expenditure category needs to go to Joe Bloggs in Finance, and the others all go to Jane Smith.
- Facilitate multi-level management relationships. Using Rules you now have the ability to allocate a step to an employee’s regional manager, country manager or any other report. This helps you control all those dotted lines!
This is just the beginning…
The Rules engine that you see now is just the first version. We have a whole list of rules that we’ll be adding to it over the next year.
And that’s where we need you. If you have rules you want to see, make sure to get in touch with your Flowingly Customer Success Manager.
What else has changed?
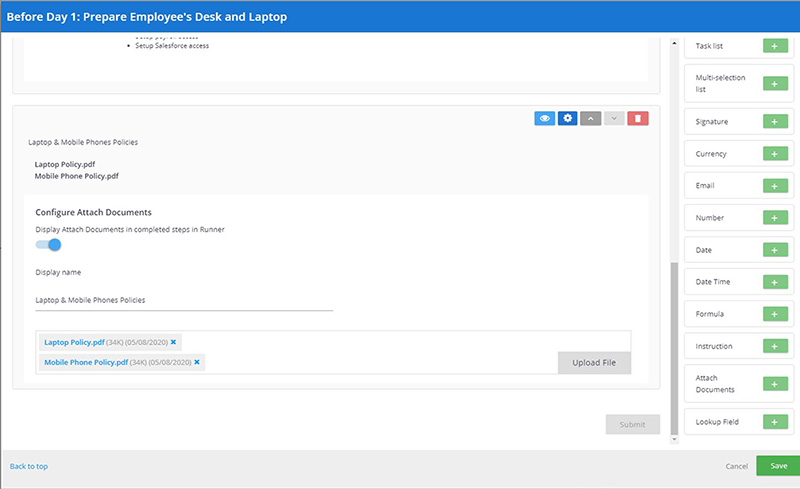
Table sums can now be used as a value in subsequent steps. This means that you can pull both currency and number sums direct from a table, either to display them easily to a user or to help route your Decision pathways.
You can also use the sums within formula fields and custom emails. So, if you have a column in a table that captures amount, in another column you could capture discount rate, and in a formula field below you could calculate the discounted rate.
This opens up a range of possibilities, especially for all those using Flowingly for financial workflows such as Capital Expenditure or Expense Management.
For more information on Rules make sure to check out our latest KB articles on Step Rules and Databases. Or if you’re looking to use the new Table sum check out the Form Fields article.
If you’d like to learn more about how Flowingly can help you manage approvals, tasks and workflows for your business, get a trial today!