Control Hazards & Risk in the Workplace

Control Hazards & Risk in the Workplace

Control Hazards & Risk in the Workplace

Worksafe New Zealand recommends organizations continuously review workplace health and safety by following the Plan-Do-Check-Act framework.
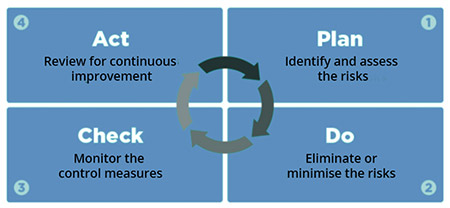
The Control Hazards and Risks in the Workplace automated process is aligned with this framework and ensures that hazards and risks are identified, reported, assessed, and mitigated as part of daily operations.

This process also completely replaces manual paper-based health and safety forms. Having lots of paperwork does not equal good health and safety. However, having clear, easily accessible, and engaging health and safety processes, enables a positive health and safety culture, and significantly reduces risks in your organization!

1. Identify Hazards Initiator

The process can be kick started by any staff member who identifies a hazard, or as part of a routine health and safety inspection.

A good place to start is analyzing situations that can be an immediate threat or cause harm. These often occur in:

  • The work environment
  • As a result of how tasks are performed
  • Plant and materials
  • Workplace design and management

2. Assess Risks H&S Coordinator

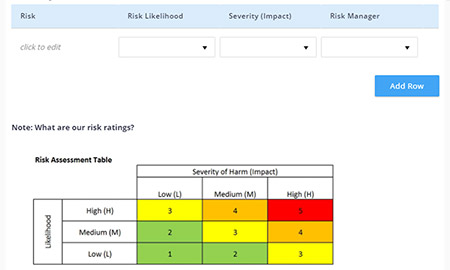
If hazards were identified, then is important that the risks associated to these hazards are assessed. Assess each risk using the Risk Assessment Table to determine:

  • The severity of the risk
  • The likelihood of the risk occurring

Then assign the risk to a Risk Manager who will control the identified risk(s).

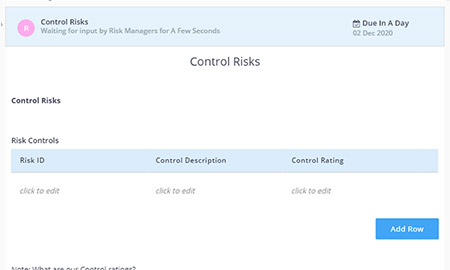
3. Control Risks Risk Managers

The Risk Managers will now receive a notification to control the risks.

It is recommended that all identified risks are completely eliminated from the workplace. However, if this is not possible then risks should be minimized in a practical manner.

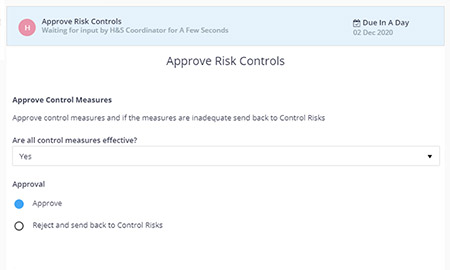
4. Approve Risk Controls H&S Coordinator

Once controls are put in place to eliminate or minimize the risks, the H&S Coordinator will review their effectiveness and approve. If some controls are not effective the flow will go back a step, until all controls are found to be effective.

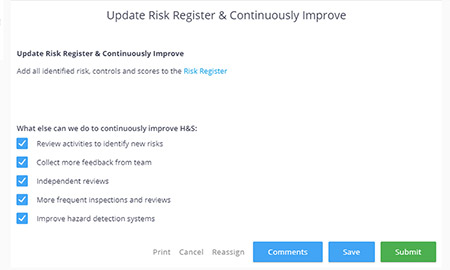
5. Update Risk Register & Continuously Improve Risk Managers

A risk register is a central database for the organization’s risks and controls. This database could live in Flowingly or it might be managed in a different system. Keeping the risk register updated is essential and significantly increases regulatory compliance. Also don’t forget to always look for opportunities for continuously improving H&S in the workplace!

Onboard & Induct a New Employee

Onboard & Induct a New Employee

Onboard & Induct a New Employee

A quality onboarding experience is the single most important step to getting a new staff member to an operational level quickly. Sadly, this is a process that many organizations only pay lip-service to.

If you’ve been lucky enough to join a company with an exceptional onboarding experience, you’ll know just how powerful it is. The benefits are endless. Better understanding of company culture. Improved grasp of responsibilities. Increased performance through better training. Decreased time to becoming fully operational.

1. Send Welcome Email and Request New Employee’s Details Manager

What better way to kick-off the new employee’s experience than with an email welcoming them to the company! This is a great way to introduce them to the company culture and set the tone for what they can expect going forward.

Use this opportunity to request the employee’s details, such as their tax details, superannuation info or their working visa. This will save you more time on their first day.

2. Complete New Employee Basic Information Manager

Once the manager has the employee’s basic information, they can collate it into a standardized form for the HR team.

When building this process, it is the responsibility of the HR team to outline exactly what they require to process a new employee. If it’s not outlined in the process, the manager will not know what is required.

3. Approve Employee Paperwork & Enter in HR System Human Resources

This step is where the HR team enters the provided details into their systems. The first action is to check that all the requested details have been entered correctly. If not, the process can be sent back to the manager to fix.

We use a combination of a task list and an approval in this step. This could be split into two, however the best processes are nice and simple. This creates no unnecessary wastage and less admin.

4. Prepare Employee’s Desk and Laptop IT Services

Now that the basic information has been covered, it’s time to setup the employee’s tool-of-trade. IT can simply come in and follow a quick checklist outlining what the employee requires. A handy addition to this step would be a quick video on desk ergonomics!

Optional extra: Some companies may require a stack of software to be setup for the new employee. If this is the case, additional fields can be used to inform IT of the required software. This removes the hassle of back-and-forth emails over logins during the first couple of weeks.

5. Issue New Employee Items Administration

It’s now Day 1 of the employee’s new job and they require some basic items to become a fully-functional employee. Things you might want to include here:

  • Mobile phone and charger
  • Security door key
  • Swipe card

If you’re more advanced with your processes, you would link this up with your employee exit process. This would allow you to mark off these items as returned at the end of employment.

6. Complete Activities by End of Week 1 New Employee

As we all know, the first week at a company can be a bit of a blur. Most organizations have a standardized approach. This step of the process should be a simple checklist, where the employee can check off that they have been introduced to the team, gone through an H&S induction, had their photo taken and more.

7. Complete Activities by End of Month 1 New Employee

The key to an effective onboarding is having specific timings and goals. It is important for the manager to set aside time to understand how the employee is tracking and to give them feedback and coaching. Many businesses have their new employees spend time with different parts of the company.

The end of month 1 is a great time to get together and review the key takeaways that the employee has had in their first few weeks. This step may include a review of what the employee has learned and opportunities for company improvement that they have seen with fresh eyes.

8. Complete Activities by End of Months 2 & 3 New Employee

By now the employee should be progressing to an operational stage. This is a good chance for the employee to review their learnings and sit down with their manager to evaluate their progress. It is important to capture feedback at this step. This will help management understand the effectiveness of the onboarding process, and whether it requires further improvement.

Assign a New Contractor

Assign a New Contractor

Assign a New Contractor

When we talk with companies across the construction, engineering and manufacturing industries, the management of contractors and subcontractors is their #1 concern. From contracts to QA to H&S, there are many things to consider when hiring a quality contractor.

With the inherent risks and pressures involved, it is essential to have quality processes in place for engaging contractors. There are many processes you need to manage contractors, including your tendering and delivery processes. The one we tackle here is designed to help you recruit a new contractor or subcontractor onto your books.

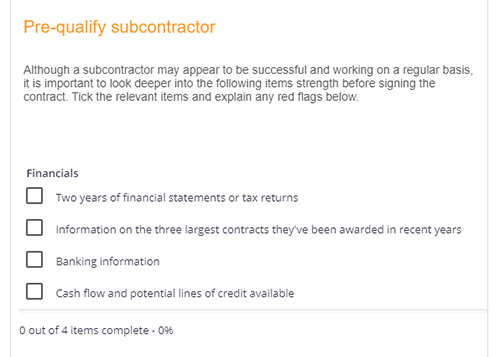
1. Pre-qualify Contract Applicants Administration

Before engaging into any agreements with a contractor, you’ll want to do a thorough check on their history to make sure that the relationship will be a successful one.

You may wish to look at:

  • Financial statements or tax returns
  • Information on recent contracts
  • Payment issues
  • Current safety practices
  • Recent incident reports

2.  Interview the Contractor & Check References Hiring Manager

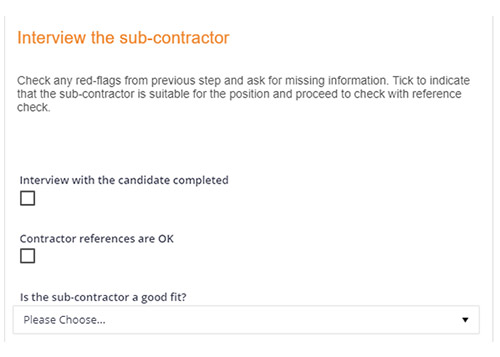
Following the pre-qualification, you will want to interview the contractor and make relevant reference checks.

This provides a good opportunity to request any information that you couldn’t get during pre-qualification and to check any red flags that may have arisen.

3. Complete & Upload Agreement & Licenses Administration

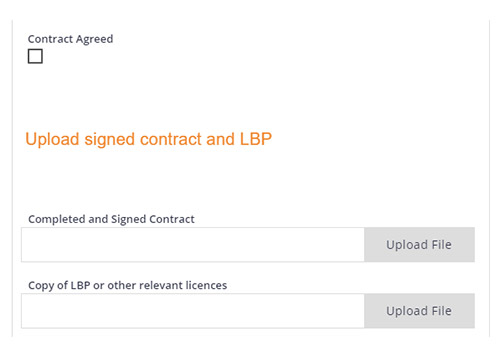
This step is especially important for compliance and legislative purposes. Before progressing further with the contractor, you will want to ensure that contracts have been drawn up and signed. You will also need a copy of all relevant licenses so that you don’t run into trouble further down the track with unlicensed work.

If you are using a workflow platform like Flowingly, you would make the contract and license upload a required field. This means that at any stage you could go back and easily access this documentation for reporting or auditing purposes.

4.  Perform H&S Induction with Contractor Health & Safety

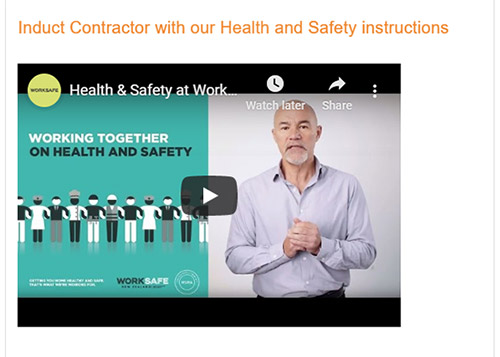
Now that the pre-qualification and contractual terms have been completed, you can start onboarding the contractor. One stage of this will be the induction to your health & safety procedures.

It may be that you need to run them through standardized procedures such as Worksafe. Or potentially you need to take them through procedures specific to your organization or a certain project. Either way, it is important to keep record that this has been completed.

5. Send Payment Instructions to Contractor  Finance

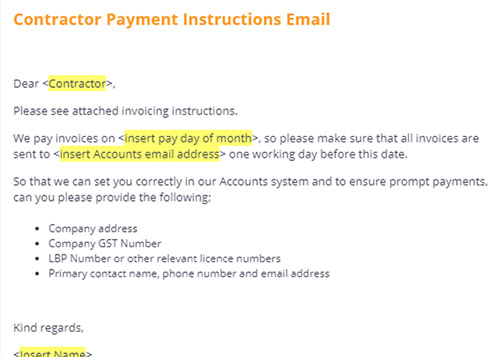
While the Health & Safety team is running through the H&S procedures, you will want to get the financial details in order.

This is a good opportunity to establish a relationship between the finance teams, outline your payment terms and gather the required details to setup the contractor in your accounts system.

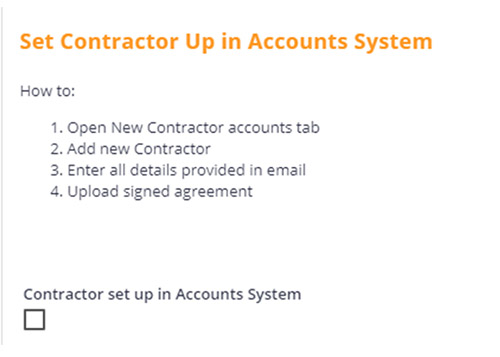
6. Set Contractor Up in Accounts System Finance

Once you have all the details to set the contractor up as a payee, it’s time to add them to your system.

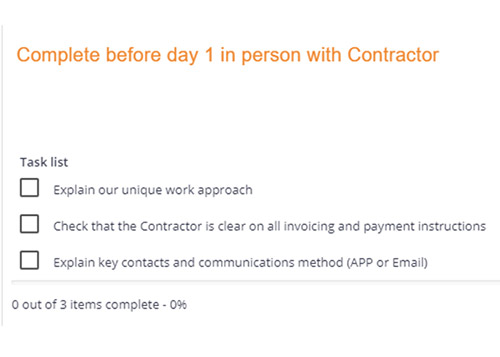
7. Meet Contractor Before Day 1 for Walk Through Hiring Manager

Before the contractor starts work on the new project, take the opportunity to meet up with them and discuss the finer details. You may want to include some intangibles, such as your approach to work, how you like your staff to interact with the community, and expectations around behaviour on site.

This is also a good chance to make sure that the payment terms are clear, and outline any key contacts, communication
methods and escalation procedures.

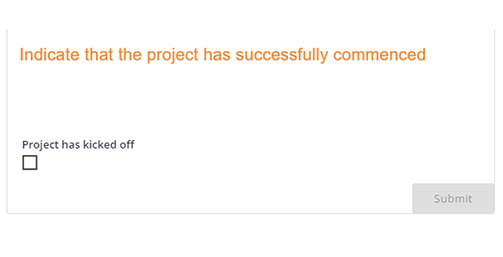
8. Initiate Project Project Manager

The assignment of the new contractor is now complete, and they will now be part of the project itself. The relevant documentation has been completed, the contractor has been run through your H&S induction and they are setup as a payee. What’s more, you now have a full record of the process for auditing and compliance purposes.

This is an excerpt from Flowingly’s latest process guide, Essential Processes for Construction.

Take your processes to new heights with our new process playbook.

Discover the building blocks of process improvement.

Process an Invoice

Process an Invoice

Process an Invoice

Processing invoices is possibly the most frequent and essential accounts payable process. Including a new supplier setup step helps keep overall complexity down and keep work flowing. Because circumstances and requirements change, it is also useful to include a step to handle any unmatched invoice and purchase order items.

1. Receive Supplier Invoice Finance

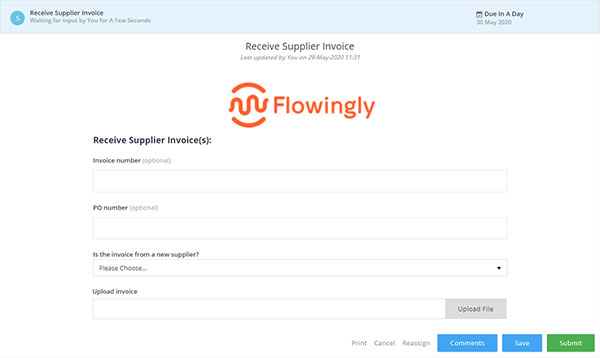
Different organizations will receive their invoices differently, but they commonly arrive to a shared mailbox. This step sees a member of the Finance team record the invoice number and PO number if known. They also indicate if the invoice is from a new supplier.

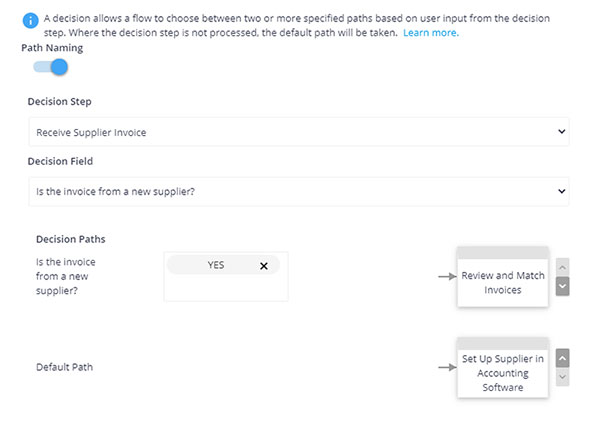
2. Is it a new Supplier? Decision

If the invoice is from a new supplier, the Finance team are prompted to set them up in the accounting software.

3. Set Up Supplier in Accounting Software Finance

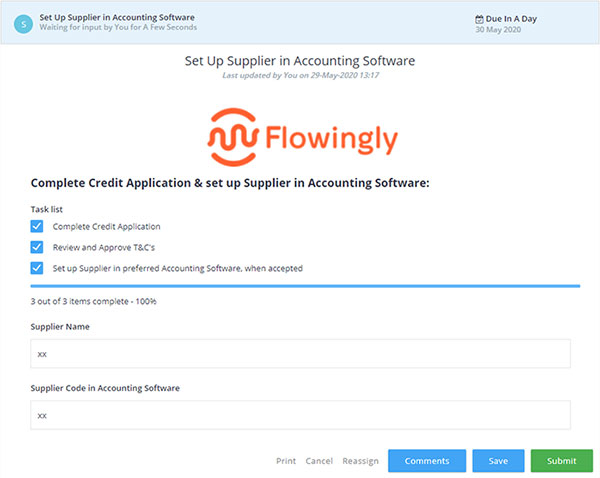
In this step, the Finance team apply for a credit trading account with the supplier. They then add the supplier to accounting software. Some organizations may wish to include an additional step to add the supplier’s information to the intranet for the benefit of non-finance staff.

4. Review and Match Invoices Finance

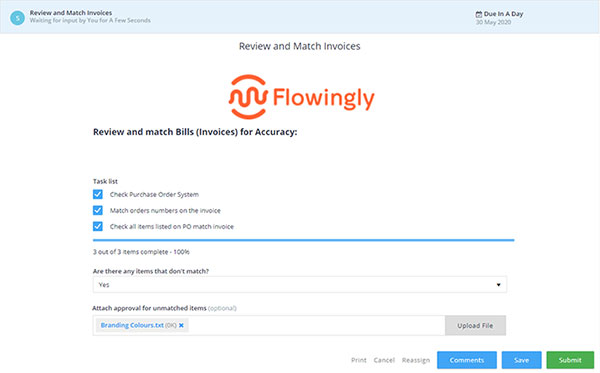
The Finance team member can now review the invoice and compare it to the purchase order. Now is the time to record is a difference exists in the items, price, or quantity. If the invoice cost is higher, the staff member must attach a form of approval from the respective cost center.

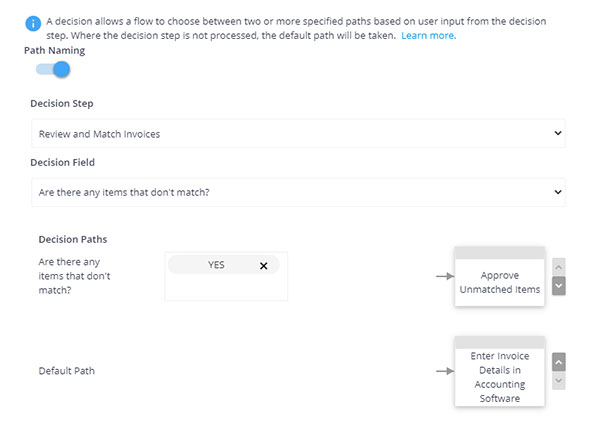
5. Are There Any Items That Don’t Match? Decision

If there is a mismatch between the invoice and PO, this is escalated to the Finance Manager for approval.

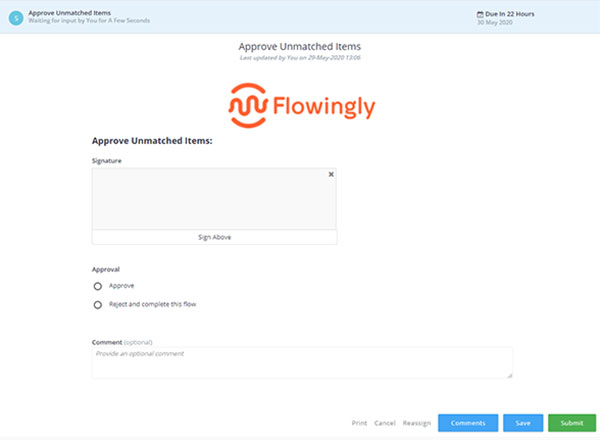
6. Approve Unmatched Items Finance Manager

Though some organizations may not explicitly require this supervisor approval, many see it as an unfortunate but necessary precaution against embezzlement. In this step, the Finance or Accounts Payable Manager can review the invoice, PO and approval documentation if required.

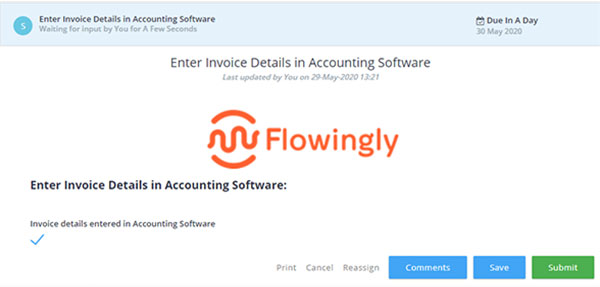
7. Enter Invoice Details in Accounting Software Finance

Once the invoice and PO have been matched, the Finance team member can enter the specifics into the accounting software to schedule payment.

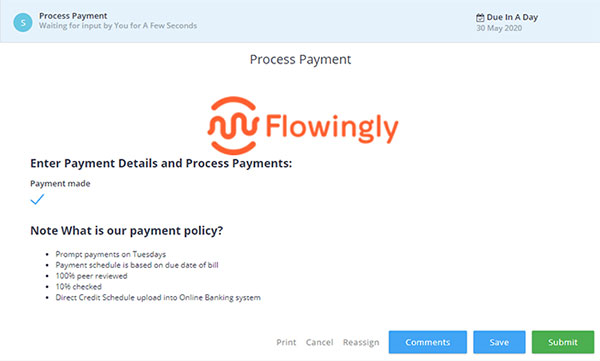
8. Process Payment Finance

Finally, once the payment has been made, the process is complete.

Onboard & Induct a New Employee

Advertise an Open Position

Advertise an Open Position

The process of writing a job description and advertising a position is often fraught with issues. Without a clear chain of communication, both the recruitment team and the advertising manager can be left extremely frustrated.

This process helps simplify the chain of communication, and leaves everyone clear on their responsibilities from end-to-end. It is also a great way to open everyone’s eyes to the exact requirements of advertising a position.

1. Gather & Validate Role Requirements Manager

The trigger for starting this process is the manager gathering and validating the requirements for the role. At this step you will want to provide the HR or Recruitment team with a basic overview of the position. Keep it simple, with only the most pertinent information being captured.

Consider things like:

  • The position title
  • Their direct manager and associated team/department
  • The estimated remuneration
  • Whether a position description exists (plus optional attachment)

2. Write a Position Description Manager

Based on the selection of the previous step, a position description may or may not need to be written. If not, the process can move straight onto the next step. If a position description has not been provided, the manager will be required to write one.

This is an essential step to keep all jobs hires consistent and well-documented across the entire business. No position description = no new hire. This ensures that everyone retains responsibility for their parts of the process.

3. Approve Vacancy Details Human Resources

The next step is for HR to read over the provided information and ensure that they have everything required to advertise the vacancy. This step is simply to make sure the details are in order.

4. Prepare Vacancy Advertisement Human Resources

Now that HR has all the required information, they can write the advertisement and decide on the best channels to advertise through. Most organizations will have a templated job advertisement, so it is a matter of taking the relevant information from the previous steps and applying it to the template.

If you were using an automated workflow here, you could simply have a checklist outlining the requirements, along with an attachment for the advertisement.

5. Approve Advertisement Wording Manager

Before the job advertisement is posted, the manager will want to have a read over the wording to make sure that 1) it describes the position correctly and 2) it will appeal to the people that they are looking to recruit.

This will be a simple approval or rejection step. If the wording is rejected, the manager can make notes and the process would loop back to the previous step. From here HR would review the notes, make the requested changes and re-submit the advertisement for approval.

6. Post Vacancy Advertisement Human Resources

Everything has been approved and you’re ready to advertise! This step is simply letting Human Resources know that they can now advertise the position.

Adding instructions in this step will be appreciated by the whole team. A quick step-by-step guide for advertising on each channel will maintain consistency, ensure that nothing is missed, and speed the process up as a whole.

7. Run the “Hire a New Employee” Workflow Manager

Here we can see how you could link this process together with other processes or workflows to create an end-to-end process for recruiting and onboarding a new employee.

Once the vacancy has been advertised, the next logical step would be to progress to the hiring process. This would then follow on to the onboarding process.

Best practice when undertaking process improvement is to break larger processes down into pieces and then link them together. This ensures that no steps are missed and allows you to analyze and refine processes easily. It will also give you a better understanding of potential bottlenecks or issues within your processes.

This is an excerpt from Flowingly’s process guide, Essential Processes for Human Resources.

Proven Processes to Streamline Your HR Journey.

Unlock the power of process and workflow improvement in HR!

Onboard & Induct a New Employee

Apply for Leave

Apply for Leave

Leave requests are one of the most common processes within an organization. For this reason, they are a great place to start with process improvement. Even small improvements here can save the business thousands of hours a year.

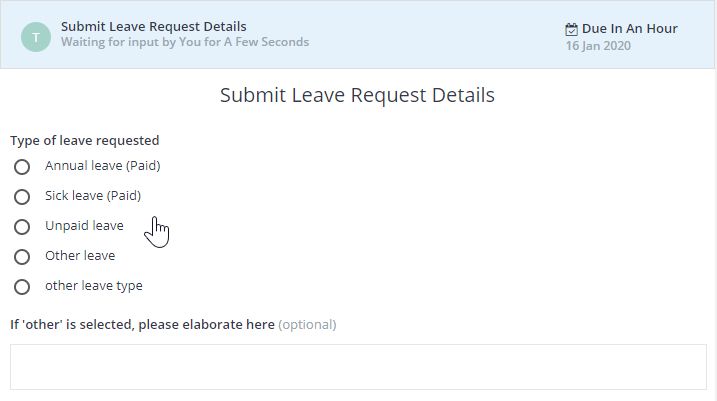
1. Submit Request Initiator

The trigger for starting this process is the employee initiating the request. You will want to capture all the required information about the request at this step, eliminating any back-and-forth later in the process.

Consider things like:

  • Type of leave (annual, sick etc.)
  • Dates requested
  • Whether leave in advance is required
  • Whether they will be contactable

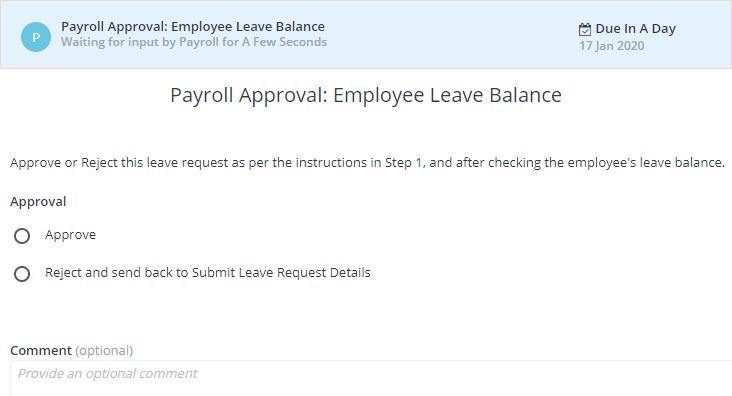
2. Check Employee Leave Balance Payroll

Upon submission of the request, the Payroll team will provide the first approval. This is simply to check whether the Initiator has enough leave accrued. This should be a basic Approval or Rejection.

If “leave in advance” was requested, Payroll can approve the request and leave a comment for the Initiator’s Manager to see in the next step.

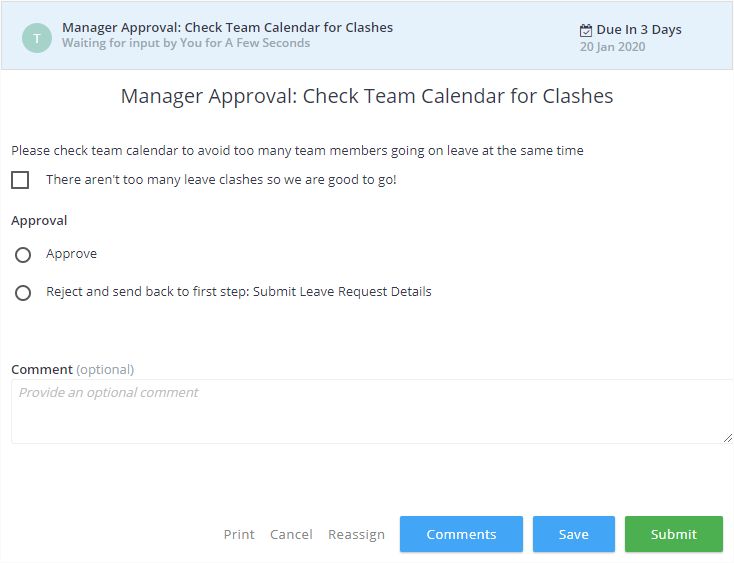
3. Check Team Calendar for Clashes Initiator’s Manager

The next step in the process is the for the Initiator’s Manager to check for any calendar clashes within their team and either approve or reject the request based on this. Depending on your organization size and structure, you may find that you have no difficulty covering a staff member’s absence, or that you need to arrange cover during this time. These are things for the manager to consider at this step.

4. Approval Email Notification

Once the leave has been approved or rejected, an automated email can be sent to the initiator to inform them of the outcome.

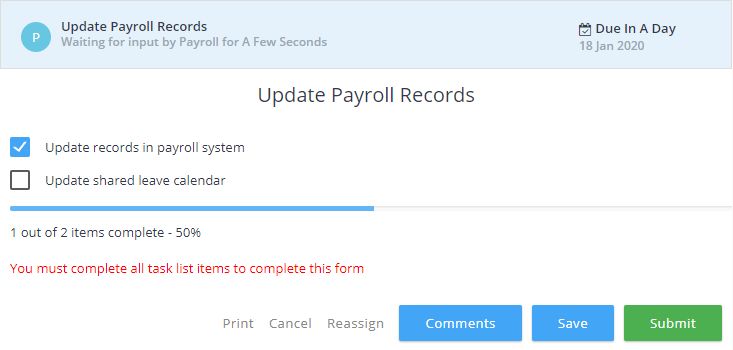
5. Update Payroll Records Payroll

The final step of the process sits with the Payroll team. This is just a reminder for them to confirm that the leave has been recorded in their payroll system and that any shared leave calendars have been updated. One of the key benefits of managing this through a workflow platform is that you can ensure this process is not marked as complete until all required steps are done.

This is an excerpt from Flowingly’s process guide, Essential Processes for Human Resources.

Proven Processes to Streamline Your HR Journey.

Unlock the power of process and workflow improvement in HR!