Release Notes – 2020 R2

Release Notes – 2020 R2

Release Notes – 2020 R2

Our most recent release of Flowingly signifies a huge upgrade to the Process Mapping capabilities of Flowingly. Let’s have a look at some of the highlights:

Map UI

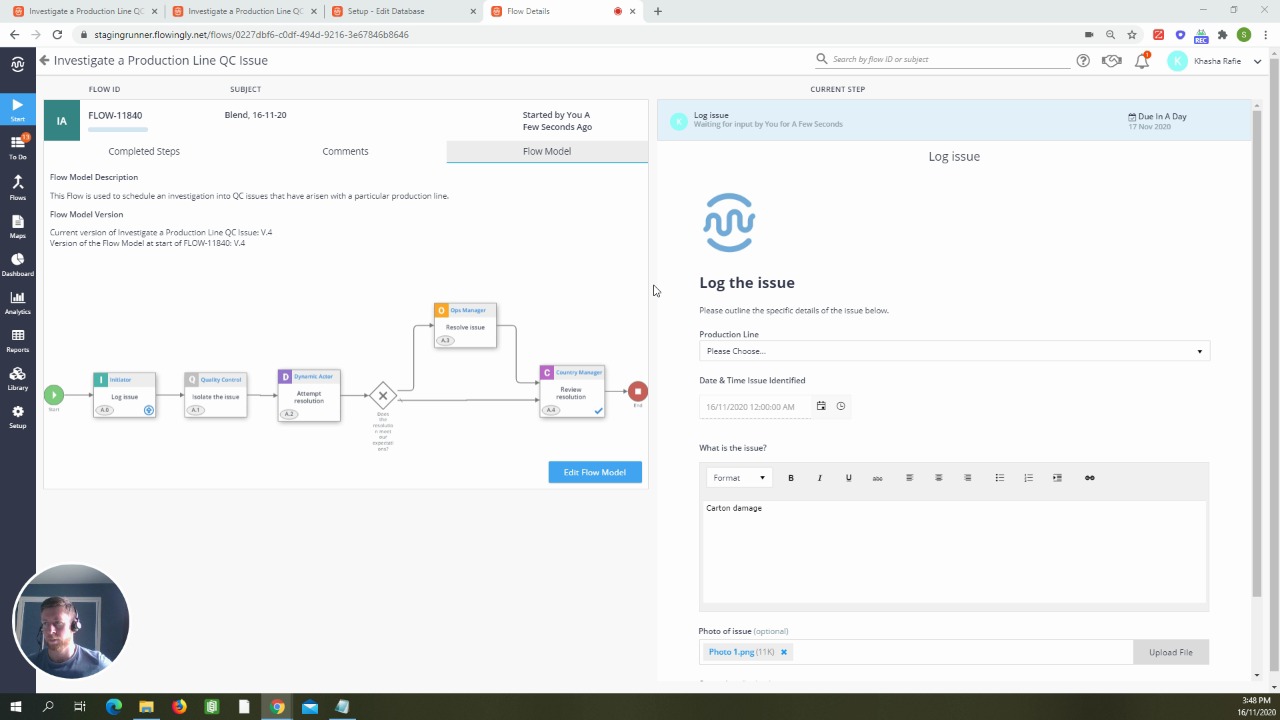
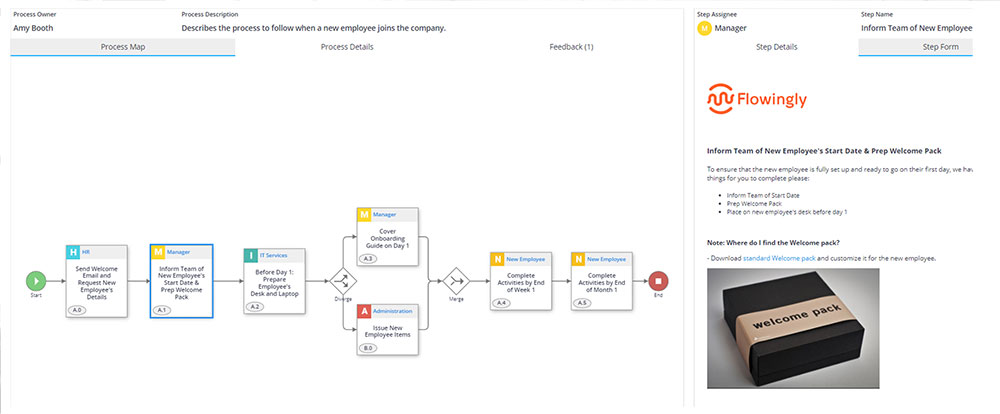
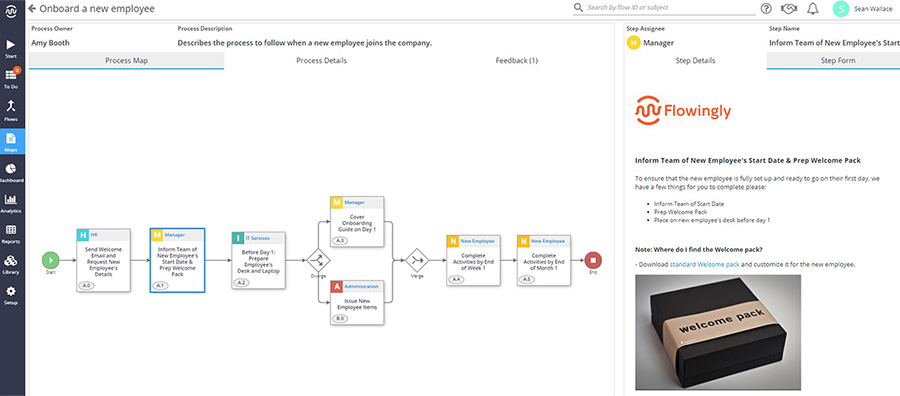
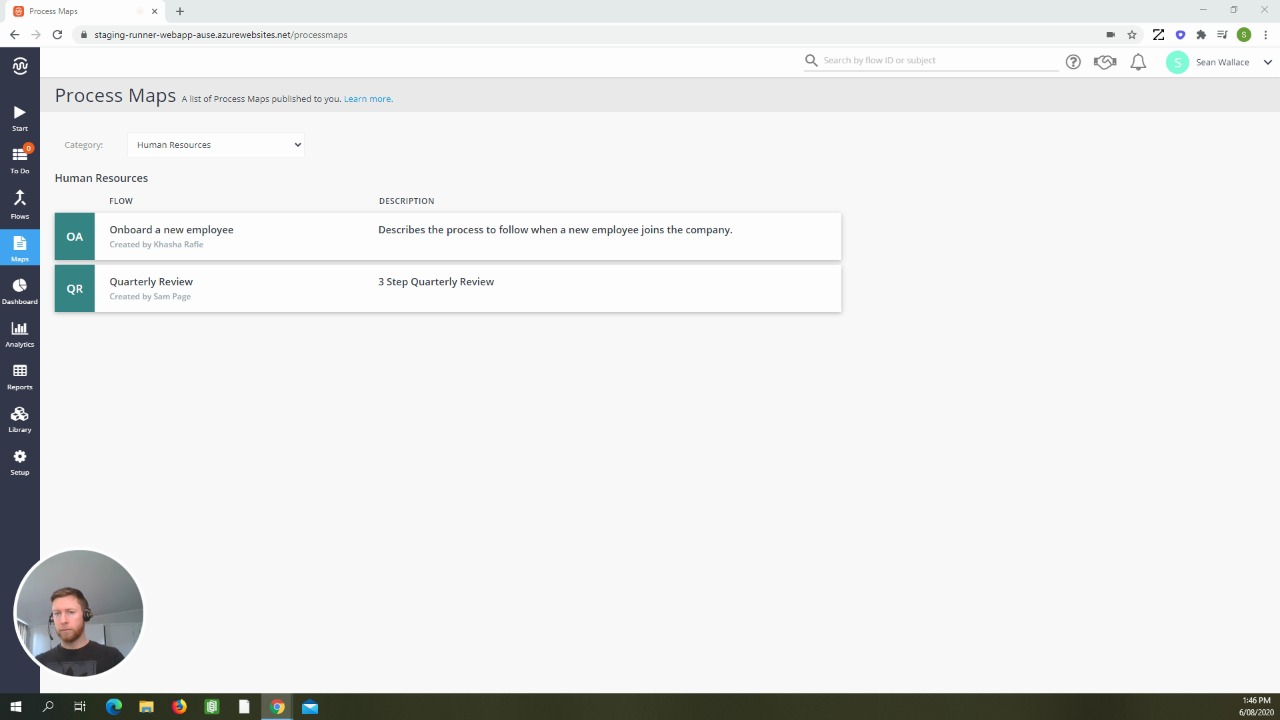
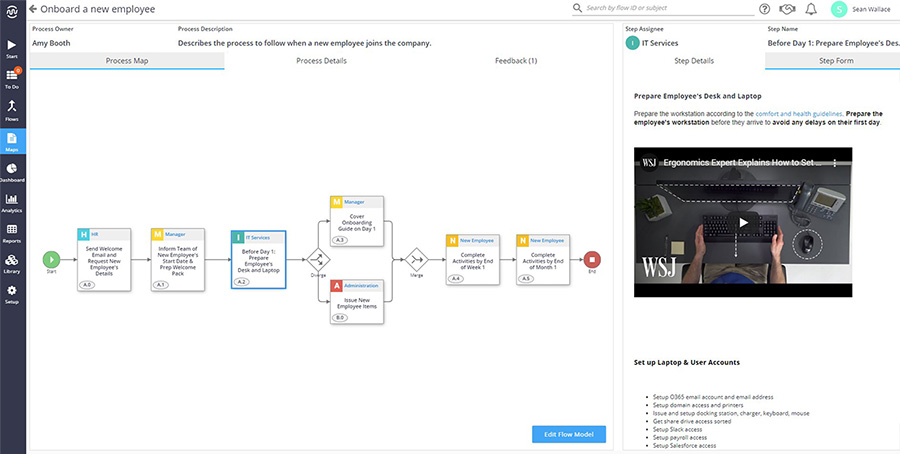
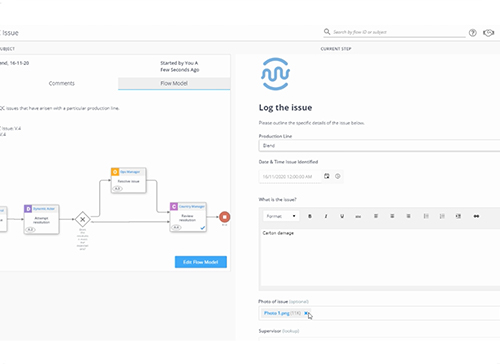
Interact with Steps directly from the Runner! Using the new map interaction features, users now have the ability to see at a glance exactly what is required at every stage of a process. This means you no longer have to open up each map, just click and drill-down!

This makes for easier navigation and access to the exact Procedures, Policies and Work Instructions that sit within a process.

Process Details

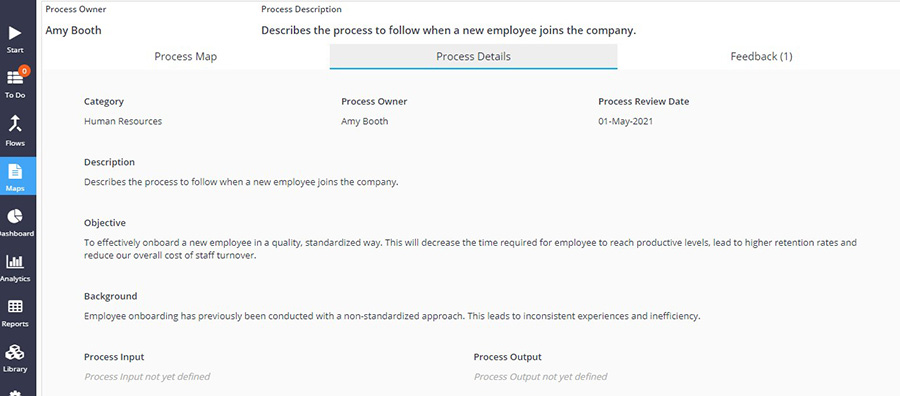
Ever wonder who the owner of a process is? Or need a bit more context around the purpose of the process?

You now have the ability to add more details into a process summary. The following fields can now be edited by admins and accessed by users: 

  • Process Owner 
  • Process Review Date 
  • Background 
  • Objective 
  • Input 
  • Output

Document Attachments 

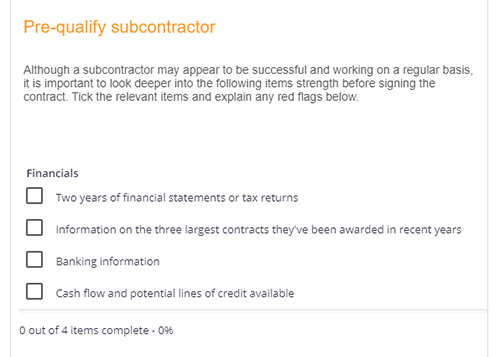
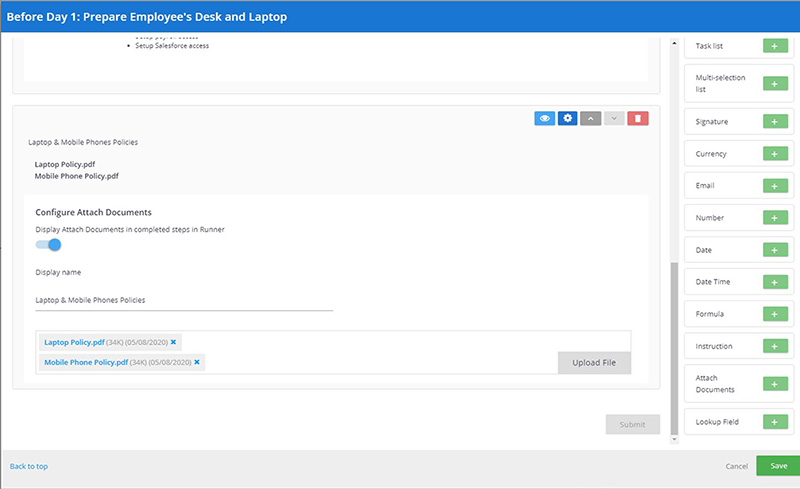
Need to include the latest SOP or Policy within a process map or workflow? The new Attach Document field in the form builder allows you to do exactly this. 

Simply attach as many documents as you need.  

By having the ability to add documents as well as videos, images and hyperlinks to external resources, you can now include everything an employee may require to complete that process.

Additional Improvements

We’ve also made a number of changes to the following: 

The size of the HTML editor within the Modeler has increased, meaning it is now much easier to edit long Instruction fields. 

Hyperlinks within a Step can now be clicked on directly from the Runner. 

Process details can now be accessed through the Edit button in the Modeler. The Pencil has been removed.

Bonus – Make your processes as engaging as possible

With this upgrade Flowingly now has more options than ever to help you build engaging processes.

Making processes and workflows engaging is important to help facilitate staff adoption and develop a strong improvement culture within your organization.

So how do you do that?

  • Encourage staff feedback and collaboration using the Feedback and Comments sections in Flowingly. 
  • Add rich content to your Steps, such as videos, images and screenshots. People are visual, and videos are much more engaging than text. This is really useful especially for staff inductions and training. (Quick Tip – If you want to make videos but don’t know where to start, give Vidyard a go!) 
  • Include helpful instructions within your processes, rather than just plain text. Same as the rich content, having clear headings, sub-headings and bolded text will help your staff digest information easier.
  • Attach or link out to supporting documents. Having a good process improvement culture includes having all the information you need in a centrally accessible location. This means that your processes should include everything a user needs, from policy documents to SOPs.
If you’d like to learn more about how Flowingly can help you on your process improvement journey, get a demo today!

Process an Invoice

Process an Invoice

Process an Invoice

Processing invoices is possibly the most frequent and essential accounts payable process. Including a new supplier setup step helps keep overall complexity down and keep work flowing. Because circumstances and requirements change, it is also useful to include a step to handle any unmatched invoice and purchase order items.

1. Receive Supplier Invoice Finance

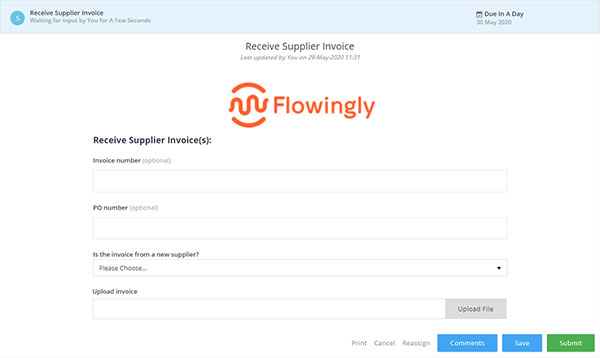
Different organizations will receive their invoices differently, but they commonly arrive to a shared mailbox. This step sees a member of the Finance team record the invoice number and PO number if known. They also indicate if the invoice is from a new supplier.

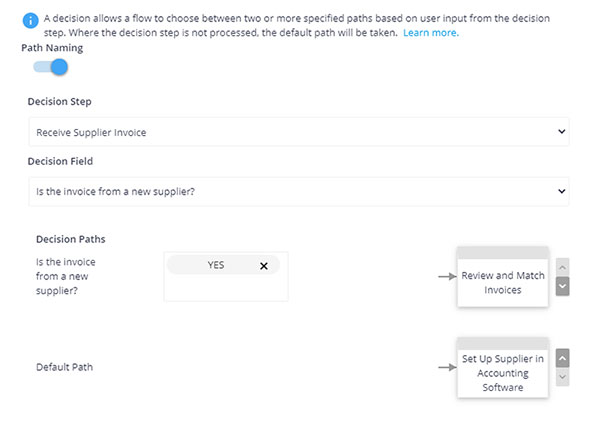
2. Is it a new Supplier? Decision

If the invoice is from a new supplier, the Finance team are prompted to set them up in the accounting software.

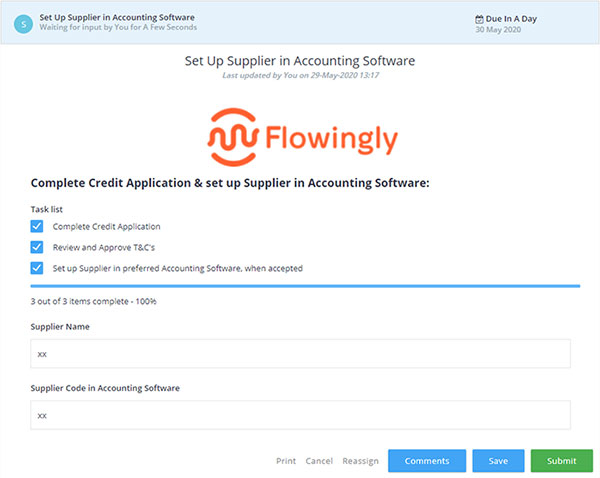
3. Set Up Supplier in Accounting Software Finance

In this step, the Finance team apply for a credit trading account with the supplier. They then add the supplier to accounting software. Some organizations may wish to include an additional step to add the supplier’s information to the intranet for the benefit of non-finance staff.

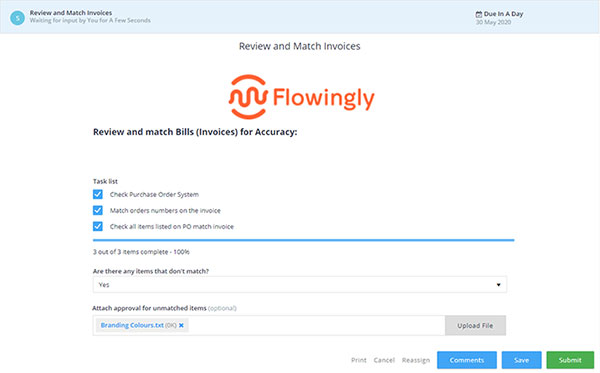
4. Review and Match Invoices Finance

The Finance team member can now review the invoice and compare it to the purchase order. Now is the time to record is a difference exists in the items, price, or quantity. If the invoice cost is higher, the staff member must attach a form of approval from the respective cost center.

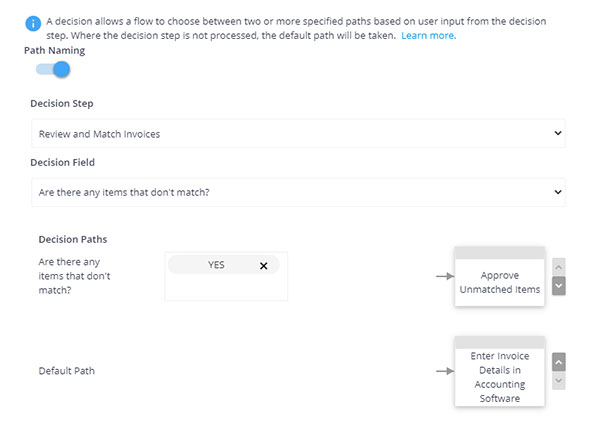
5. Are There Any Items That Don’t Match? Decision

If there is a mismatch between the invoice and PO, this is escalated to the Finance Manager for approval.

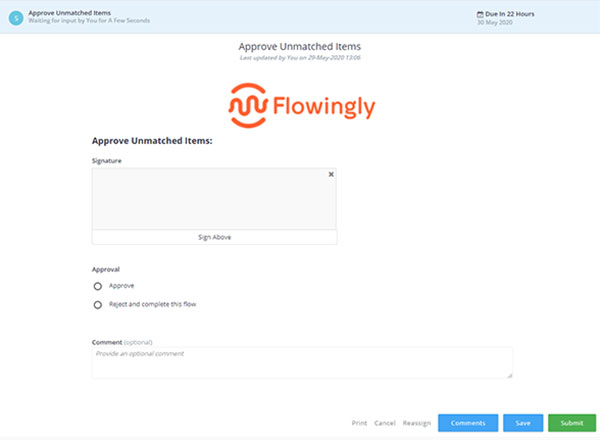
6. Approve Unmatched Items Finance Manager

Though some organizations may not explicitly require this supervisor approval, many see it as an unfortunate but necessary precaution against embezzlement. In this step, the Finance or Accounts Payable Manager can review the invoice, PO and approval documentation if required.

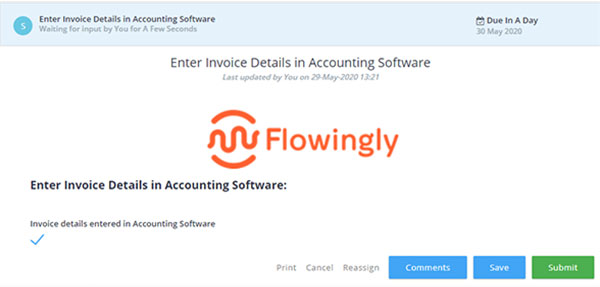
7. Enter Invoice Details in Accounting Software Finance

Once the invoice and PO have been matched, the Finance team member can enter the specifics into the accounting software to schedule payment.

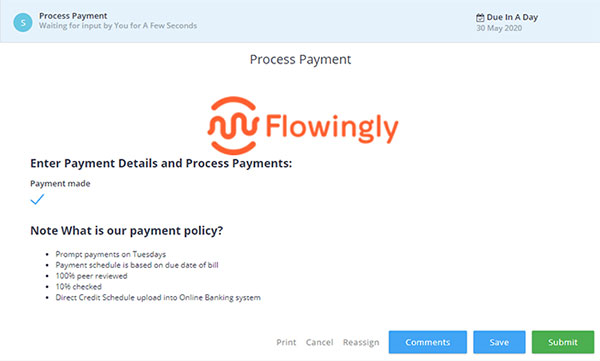
8. Process Payment Finance

Finally, once the payment has been made, the process is complete.

Creating a Vision for Your Process Journey

Creating a Vision for Your Process Journey

Creating a Vision for Your Process Journey

It is essential to meet evolving market and business requirements. Countless businesses embrace process mapping and automation. A strong plan allows you to make precise course corrections while minimizing disruptions. Creating a vision for process improvement doesn’t have to be complicated, but it does require a vision and good planning to be carried out properly.

Determining YourVision!

In order to get your process journey started on the right foot, you need to determine your vision. As well as looking at specific problems you’re trying to solve, think about your outcomes. Consider what you want to achieve in the long term and the experience you want to create for your customers and employees. Some questions you may want to ask yourself include:

  • What does an “effective process” look like for the company?
  • How much of a change do I want to make? 
  • What is my benchmark for successful process improvement?
While needing to address future needs, your process improvement plan also needs to meet short-term objectives, using resources available today. Being able to communicate your target state is essential to get buy-in from all team members. A clearly articulated vision will resonate with employees, shareholders and customers. It aligns your efforts and promotes understanding during the project.
Allocation of Resources

Preparing your team is the next step of a successful process improvement effort. This includes creating a team of business domain experts. If you don’t have the capacity to build an in-house team, try to find a partner or platform vendor who can be trusted to implement your company’s business improvement journey.

Process improvement is an ongoing process, but it’s still worth thinking about what can be achieved in the short term with the resources available. 

Recent technological advances have presented huge opportunities for competitive advantage gains from process improvement. This has put on some extra pressure, with 85% of key decision makers now feeling they have only 2 years to make significant progress on digital transformation projects, including implementing workflow automation. Fortunately an experienced process improvement partner or platform vendor should help your organization make gains in a much shorter time-frame.

The business landscape will continuously evolve. Instead of focusing on the specifics of your process think about your pace of change and the ideal outcomes.

Frameworks to Begin Process Improvement

There are a number of existing frameworks to assist you in your journey. Their structure supports and guides all levels of your organization on successfully implementing change. Pro-activity trumps reactivity in an effective business environment, so continuous innovation allows organizations to launch, learn and revise approaches. A successful process framework aims to drive a broader cultural shift within the organization, particularly in the areas of empowerment, transparency and accountability.

Some tips to consider:

  • Create the right working environment, even if your team is distributed or remote, information sharing needs to be a core component of your working environment.
  • Celebrate and recognize team successes to keep morale high.
  • Enlist help from knowledgeable and experienced staff.

By improving collaboration, you can deliver better value and reshape processes more effectively.

Often, it’s difficult to know where to begin. We propose the following approach to our clients to get them started: 
  • Gather and document process requirements
  • Map existing process
  • Automate process
  • Test process flow
  • Test against requirements
  • Address issues
  • Deliver the finished product
Once their existing process is automated, we then recommend they use their process management platform reporting to identify areas of improvement.

Implementing process improvement is necessary to ensure you’re not left behind in an age of rapid change. Creating a timeline and roadmap for following the above recommendations will help you transform your organization for the better.

This is an excerpt from Flowingly’s process guide, Creating a Culture of Process Improvement.

Advertise an Open Position

Advertise an Open Position

Advertise an Open Position

The process of writing a job description and advertising a position is often fraught with issues. Without a clear chain of communication, both the recruitment team and the advertising manager can be left extremely frustrated.

This process helps simplify the chain of communication, and leaves everyone clear on their responsibilities from end-to-end. It is also a great way to open everyone’s eyes to the exact requirements of advertising a position.

1. Gather & Validate Role Requirements Manager

The trigger for starting this process is the manager gathering and validating the requirements for the role. At this step you will want to provide the HR or Recruitment team with a basic overview of the position. Keep it simple, with only the most pertinent information being captured.

Consider things like:

  • The position title
  • Their direct manager and associated team/department
  • The estimated remuneration
  • Whether a position description exists (plus optional attachment)

2. Write a Position Description Manager

Based on the selection of the previous step, a position description may or may not need to be written. If not, the process can move straight onto the next step. If a position description has not been provided, the manager will be required to write one.

This is an essential step to keep all jobs hires consistent and well-documented across the entire business. No position description = no new hire. This ensures that everyone retains responsibility for their parts of the process.

3. Approve Vacancy Details Human Resources

The next step is for HR to read over the provided information and ensure that they have everything required to advertise the vacancy. This step is simply to make sure the details are in order.

4. Prepare Vacancy Advertisement Human Resources

Now that HR has all the required information, they can write the advertisement and decide on the best channels to advertise through. Most organizations will have a templated job advertisement, so it is a matter of taking the relevant information from the previous steps and applying it to the template.

If you were using an automated workflow here, you could simply have a checklist outlining the requirements, along with an attachment for the advertisement.

5. Approve Advertisement Wording Manager

Before the job advertisement is posted, the manager will want to have a read over the wording to make sure that 1) it describes the position correctly and 2) it will appeal to the people that they are looking to recruit.

This will be a simple approval or rejection step. If the wording is rejected, the manager can make notes and the process would loop back to the previous step. From here HR would review the notes, make the requested changes and re-submit the advertisement for approval.

6. Post Vacancy Advertisement Human Resources

Everything has been approved and you’re ready to advertise! This step is simply letting Human Resources know that they can now advertise the position.

Adding instructions in this step will be appreciated by the whole team. A quick step-by-step guide for advertising on each channel will maintain consistency, ensure that nothing is missed, and speed the process up as a whole.

7. Run the “Hire a New Employee” Workflow Manager

Here we can see how you could link this process together with other processes or workflows to create an end-to-end process for recruiting and onboarding a new employee.

Once the vacancy has been advertised, the next logical step would be to progress to the hiring process. This would then follow on to the onboarding process.

Best practice when undertaking process improvement is to break larger processes down into pieces and then link them together. This ensures that no steps are missed and allows you to analyze and refine processes easily. It will also give you a better understanding of potential bottlenecks or issues within your processes.

This is an excerpt from Flowingly’s process guide, Essential Processes for Human Resources.

Proven Processes to Streamline Your HR Journey.

Unlock the power of process and workflow improvement in HR!

Process an Invoice

Expense Claim

Expense Claim

In most organizations, particularly those that require staff to travel, it’s common for employees to incur expenses that require reimbursement. If staff have a pre-approved spending limit, a very simple process is all that is required. This is an easy first step into process improvement and the world of workflow automation.

1. Expense Claim Initiator

The process begins with a staff member submitting a claim. This step prompts them to enter an itemized list of expenses claimed and the dates the costs incurred. This list is supported by the respective receipts.
Additionally, a reminder of the daily spending limits is included.

2.  Approval by Manager Initiator’s Manager

Once the claim is submitted, the initiator’s manager reviews and either approves or rejects the claim.

3. Update Payroll Payroll

This process concludes with the Finance team. They perform a final check of the supplied information. If all details supplied are correct, they update the payroll system and the process is concluded.