How to Create Engaging Process Maps Your Team Will Actually Follow
Whether you’re a seasoned pro or just starting out, these comprehensive best practices will guide you towards creating engaging process maps that drive efficiency and clarity. No fluff, no jargon – just practical tips to elevate your workflow game.
Lay the Foundation with Clear Process Information
Before diving into the nitty-gritty of building better process maps, you’ll first want to ensure your processes are clear and make sense. Think about the key information that everyone, from new hires to seasoned veterans, need to understand and follow the process.
Use plain language that everyone can understand, avoiding unnecessary jargon or technical terms. For example, instead of “utilise proprietary software,” opt for “use our in-house software tool.”
Example: In your expense approval process, provide detailed instructions that outline each step clearly. Ensure you specify what criteria they consider when reviewing expenses. For new employees, include links to relevant policies and guidelines to help them understand the process better. For veterans, highlight any recent updates or changes to the process to keep them informed and up-to-date.
Bring Your Processes to Life with Rich Content
Text-heavy process maps can be daunting and overwhelming.
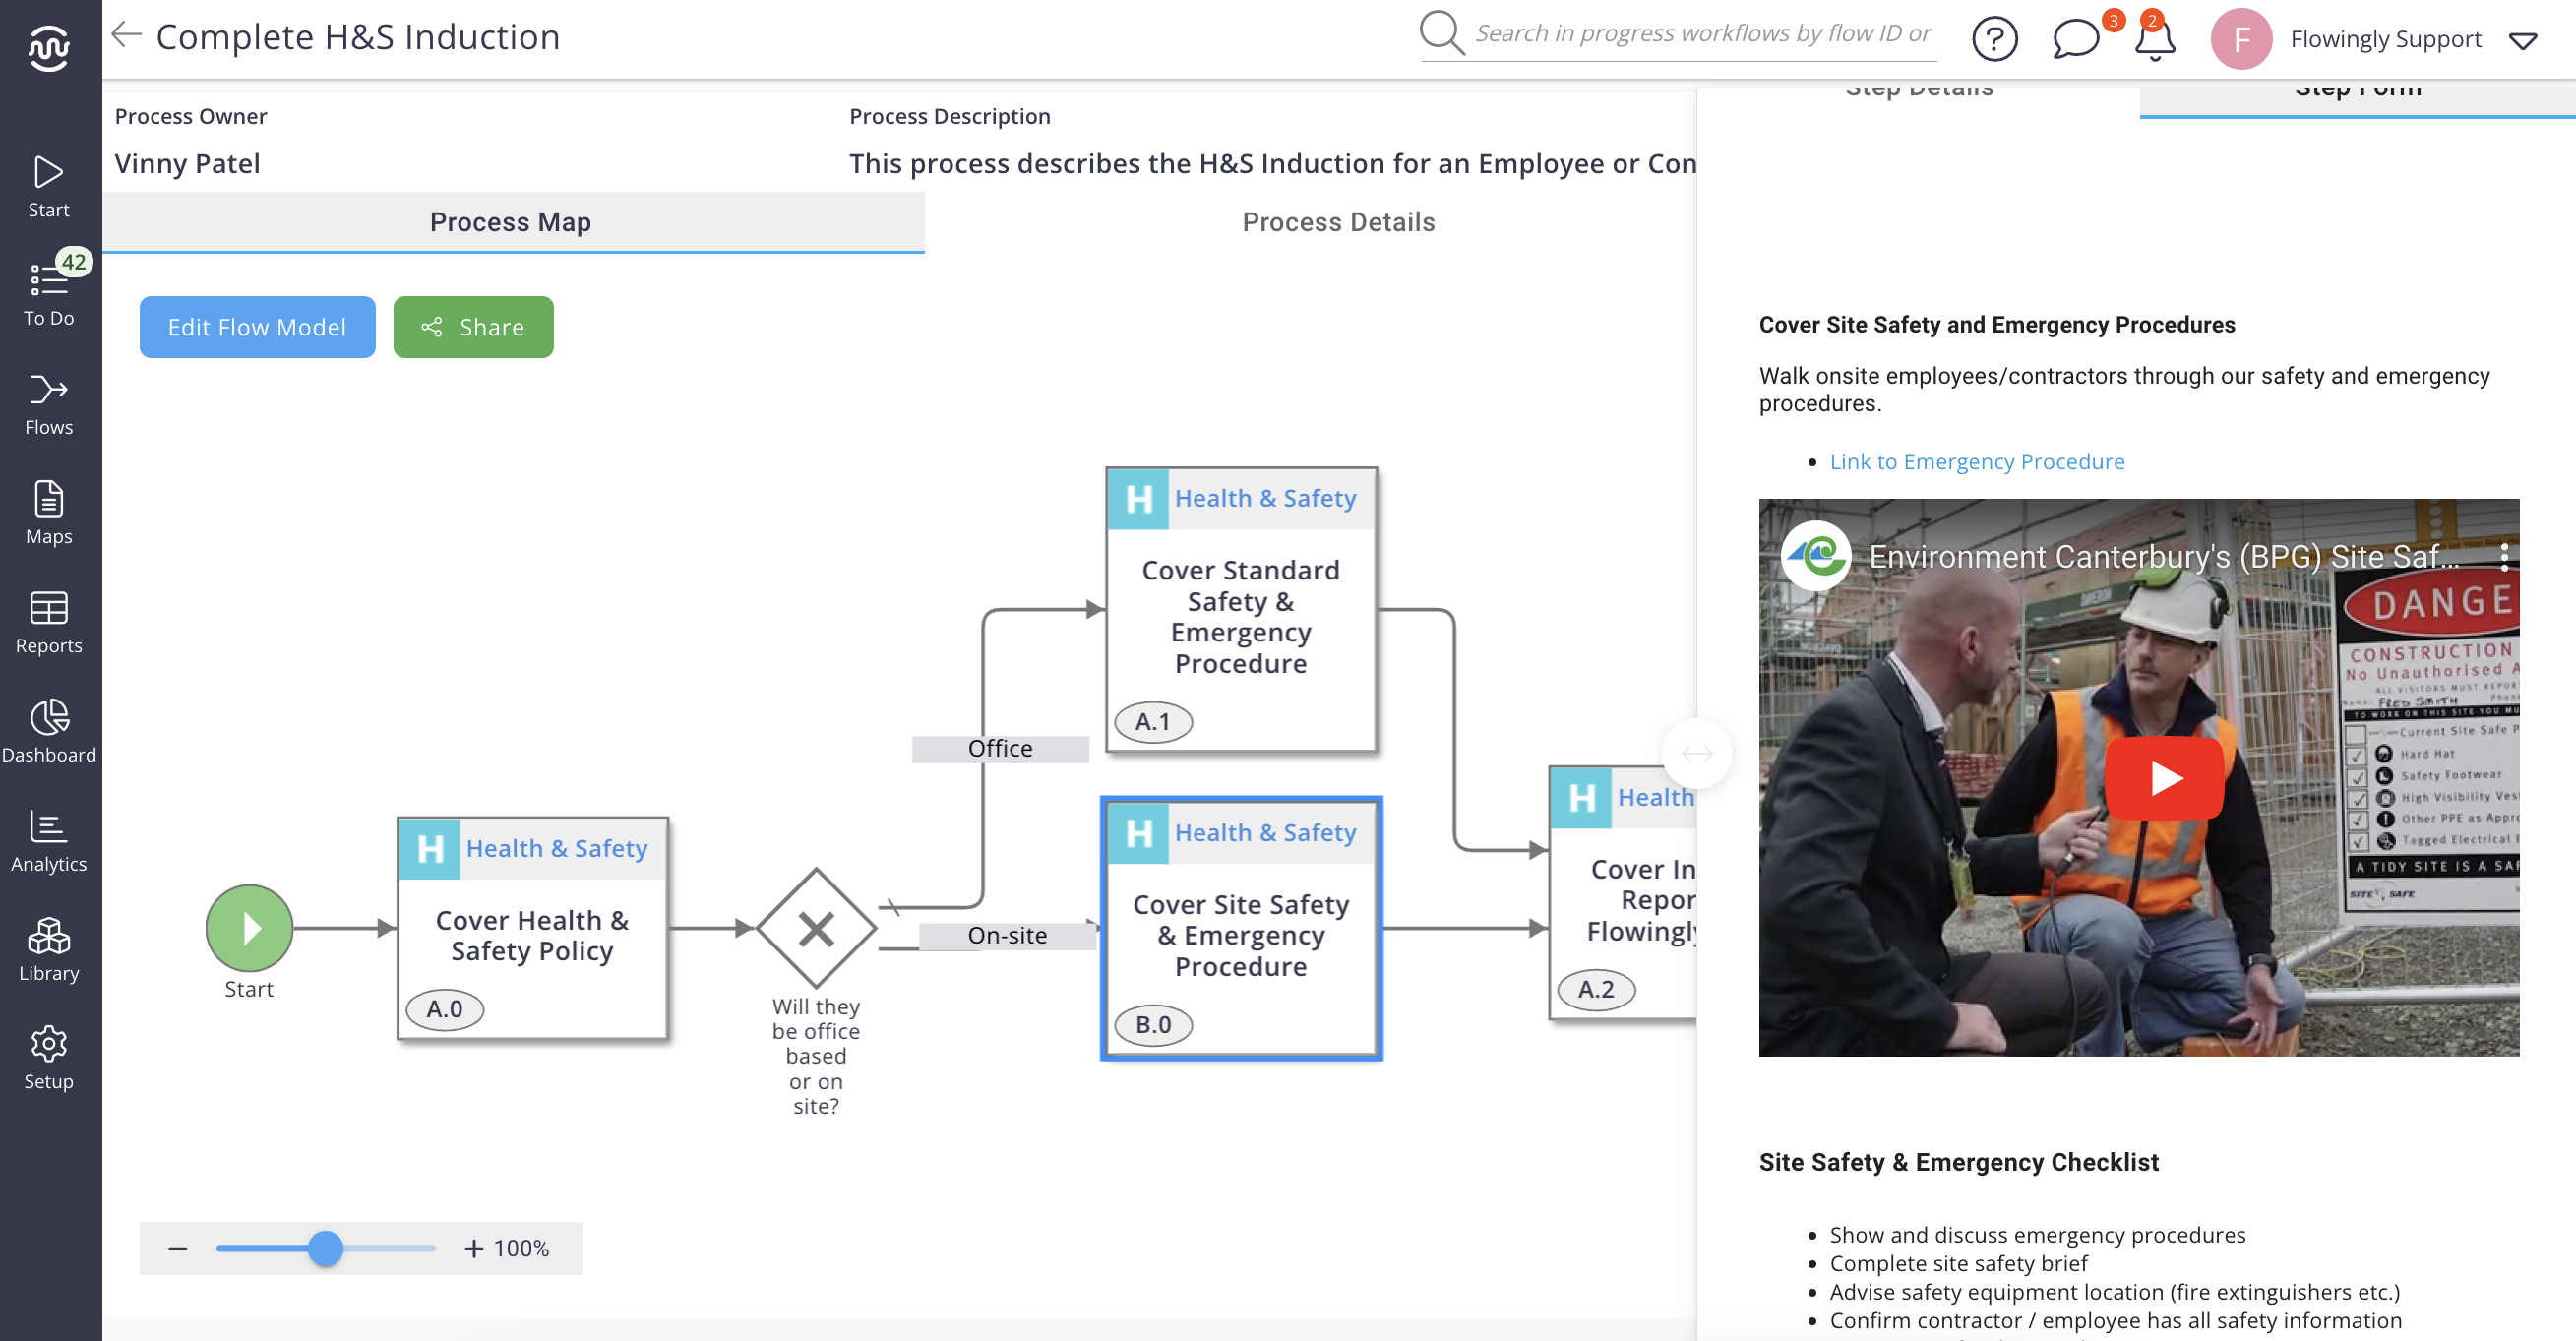
To enhance engagement and understanding, consider incorporating rich content such as videos, images, or links to relevant resources.
Example: if your process involves a specific software application, embed a tutorial video demonstrating how to navigate it effectively. A five-minute video will be much more helpful than a 50-page PDF. Likewise, provide links to company policies or guidelines to provide additional context where needed.
Master the Art of Process Design
Designing a process map is similar to crafting a well-oiled machine – every component should fit seamlessly together to achieve optimal efficiency.
Start by outlining the main steps of your process in chronological order, ensuring that each step logically flows into the next.
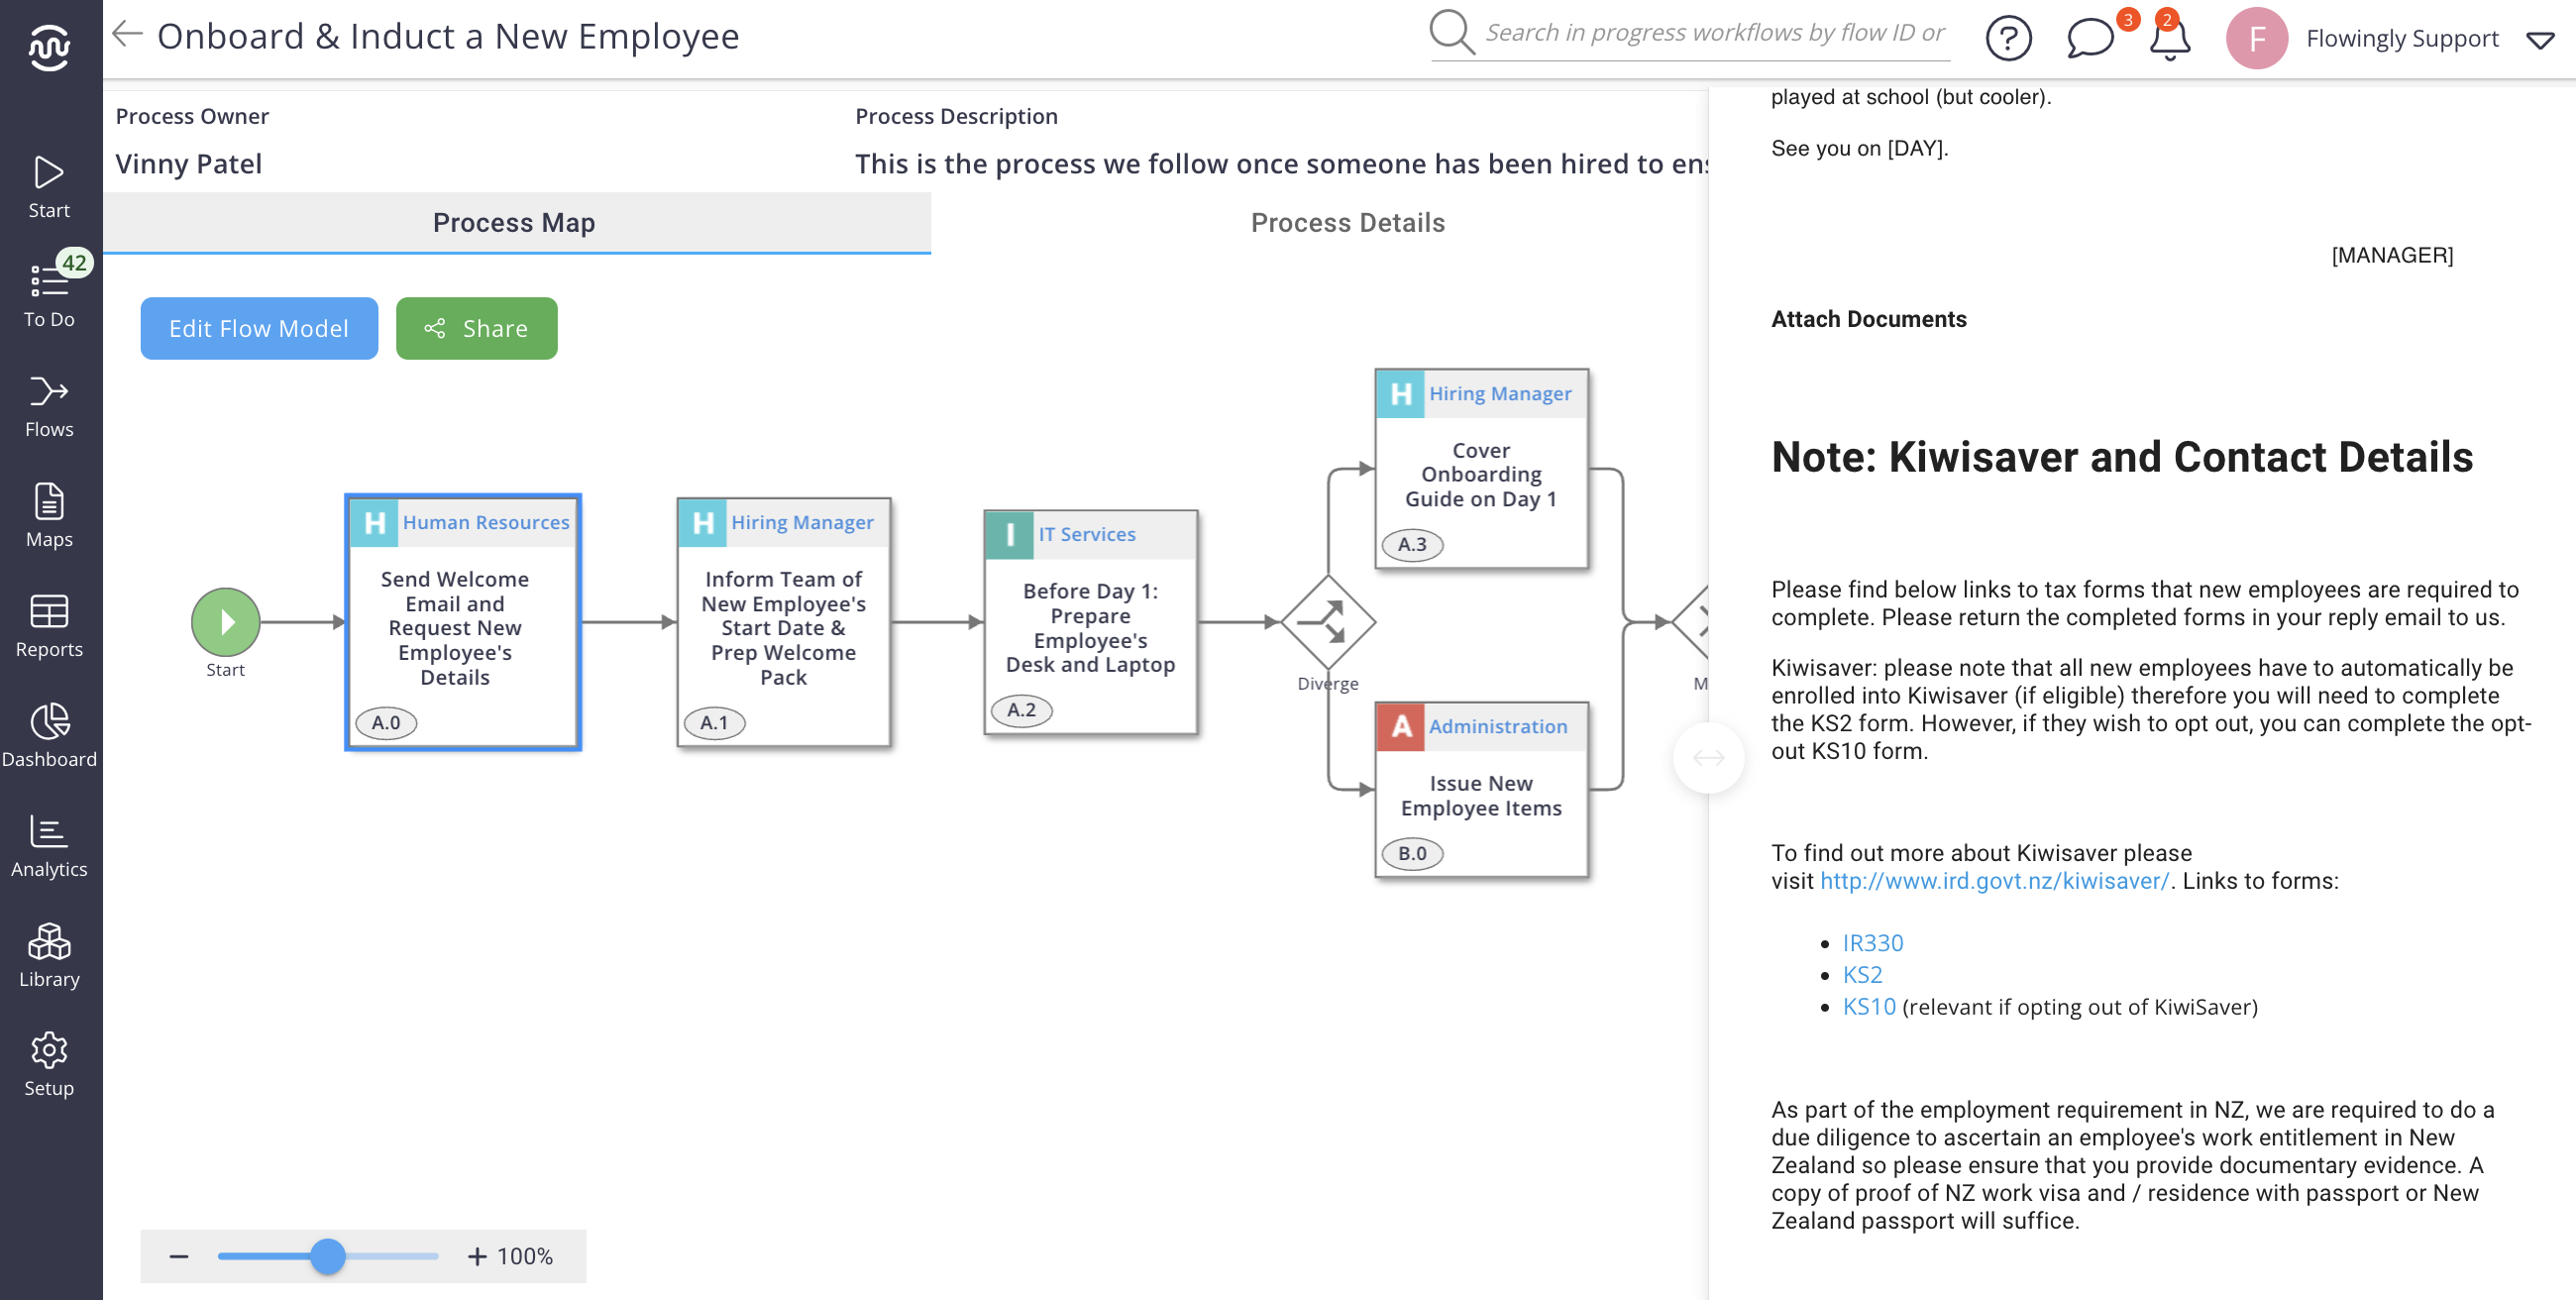
Example: Let’s say you’re mapping out an employee onboarding process. Begin by identifying the key stages, such as recruitment, orientation, and training. Then, break down each stage into smaller, actionable steps, such as conducting interviews, completing paperwork, and assigning mentors.
Use Flowingly’s visual editor to arrange these steps in a logical sequence, ensuring a smooth transition from one stage to the next. With process linking in Flowingly, you can also build out a mega process with all the onboarding sub-processes in one.
Simplify, Simplify, Simplify
Complexity is the enemy of efficiency. As you design your process map, keep an eye out for opportunities to streamline and simplify.
Are there any redundant steps that can be eliminated without sacrificing quality? Any bottlenecks that need to be addressed to improve flow?
By trimming the fat and focusing on what truly matters, you can create leaner, more efficient workflows that minimise delays and errors.
Example: In your employee onboarding process, you may discover that certain administrative tasks, such as filling out multiple forms, can be consolidated and done all at once (i.e. tax forms, KiwiSaver, contact details). By centralising these tasks and automating repetitive processes, you can reduce paperwork and streamline the onboarding experience for new hires.
Embrace Best Practices for Process Mapping
To ensure consistency and clarity across your process maps, it’s essential to embrace established best practices. Standardising naming conventions, using consistent symbols and colours, and documenting exceptions and variations are just a few examples of best practices to incorporate into your workflow design.
Example: Adopt a standardised naming convention for activities and decision points within your process maps. For instance, use clear and descriptive labels such as “Review Application” or “Approve Request” to ensure that everyone understands the purpose of each step. Consistency in naming conventions makes it easier for team members to navigate and understand complex workflows.

So there you have it – a comprehensive guide to building engaging process maps in Flowingly. By following these best practices and incorporating real-world examples into your workflow design, you can create streamlined, efficient processes that drive success for your organisation. Happy mapping!
The Flowingly Blog
Get the flow-down on all things Flowingly. From process tips to product, we cover everything you need to level up your processes.
Flowingly Product Update – Confidential Steps
This update takes confidentiality to the next level by allowing workflow designers to apply confidentiality settings to individual steps within a flow. 🔒
Comparing Process Automation: Flowingly & Microsoft Power Automate
This blog explores the differences between Flowingly and Power Automate, highlighting their unique strengths and how teams can use both to level up their automation efforts.
Flowingly – May Release Notes
Discover the latest enhancements and bug fixes in Flowingly with our May Release Notes blog!
